Welcome to the second installment of my posts on doll sewing! Instead of specific "how to sew X" tutorials, I have decided to focus more on little tips and tricks to bring your sewing to the next level. Some posts will be more complicated than others, but I do want to try and make each post as easily understandable as possible to most people.
Making tutorials is a very new process for me, so I hope this is clear. If it isn't, do let me know!
Pattern Matching and Why I Think It’s Important
2. Matching patterns for bodices/dresses
Now if we’re matching patterns on pattern pieces which have a flat edge, it’s naturally a lot easier than something with curves. So how do you get your curved pieces to match up?
Firstly, you are going to have to cut each piece out separately, you can’t fold your fabric in half and cut two pieces. Why? Because the patterns rarely match. You will have much more control if you cut each piece out separately.
Once you have cut out your centre front piece/s, lay out the next piece. Make sure that any horizontal lines match up, especially at the top and bottom of the piece, the bust and the waist. You will use these lines to match your pattern up when sewing the pieces together.
The piece on the right is my centre front piece. The bottom of the piece is on a thin black line, so I have placed my side front piece on the same line. The little lines on my pattern at the curve of the bust is where the bust point is. I have just slightly cut into my pattern so that I know where the bust point is. Making a little cut into the fabric at the bust, waist and hip points can help with pattern matching if you have no horizontal lines on your fabric to match up (just be sure to not cut further in than the seam allowance!)
My cut is in between the thin black line and the thicker patterned line, so I line my side front pattern up the same. Once you have lined them up, cut them out. Then you do the same on the other side, making sure that it mirrors the piece you just cut out.
Then you do the same thing with each piece, lining it up against the connecting piece you just cut out, until you have all your pieces:
Check that everything balances out – your horizontal lines are staying horizontal; and your pieces mirror each other.
3. Matching patterns for pants.
Pattern matching works essentially the same for pants, except that this time the most visible point of matching is the side seam.
Lay your patterns out so that the side seams match, again using any horizontal lines as balance for the hem, crotch and hip lines.
If you have pockets at the front, try and match up the pocket pieces with the front of the pants:
Once it is sewn, the patterns on the pants and pocket should match up like so:
4. Matching as you sew
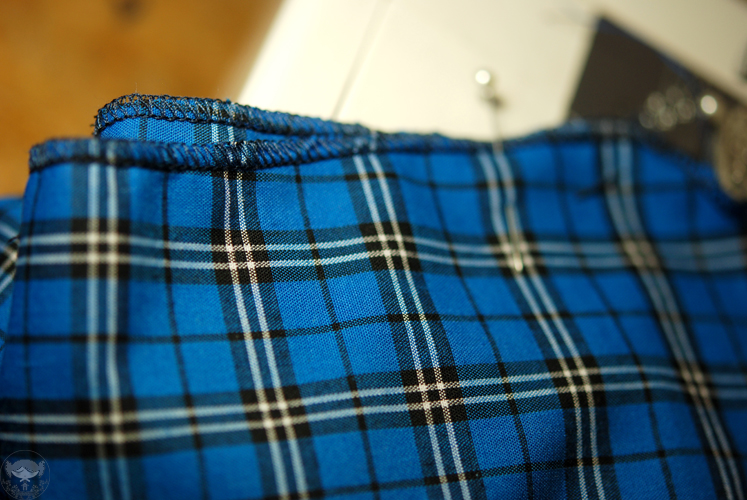
As you are sewing, make sure you’re matching up any horizontal points. It is usually best to pin those main points together like so:
Making tutorials is a very new process for me, so I hope this is clear. If it isn't, do let me know!
Pattern Matching and Why I Think It’s Important
Clothing made from patterned fabric can make an otherwise
plain outfit look bold or interesting, but how you use that fabric can
determine just how good it looks.
In my last post I briefly touched on the importance of scale
in doll clothing, and how the wrong size print can stop a garment from looking
realistic. Today I’m going to talk about the importance of balance,
specifically in regards to fabric patterns.
Patterned fabric will catch a person’s eye, and naturally we
want them to like what they see. Like the composition of a picture, a garment
needs to be balanced in order for it to be harmonious. If it isn’t, people may
feel something isn’t quite right, even if they can’t put their finger on it. Matching the pattern on your fabric can help with this.
I will be using plaid fabric as an example in this post, as
the vertical and horizontal lines help illustrate this balance.
1. Centre front =
central focus
Imagine a vertical line down the centre of your body,
splitting your body into left and right sides. This is known in sewing as your
centre front (and of course the same point on your back is your centre back).
This is generally your central point of focus, and you want your fabric to be
the most perfectly aligned at this point.
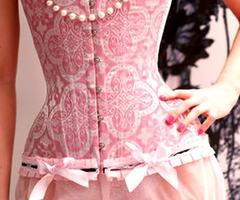
This old Bibian Blue corset is a good example of poor pattern
matching at the centre front:
See how one side is slightly lower than the other? This
results in the corset having an awkward, slightly sloping look. With geometric
patterns like this you need to be level horizontally, or make it
obviously diagonal.
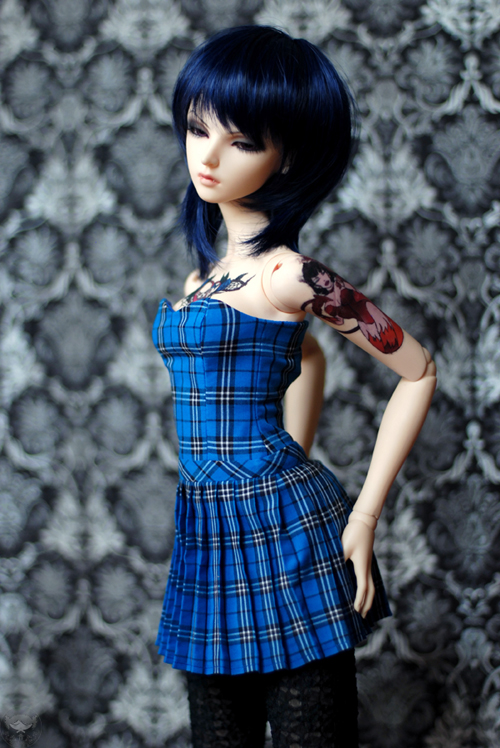
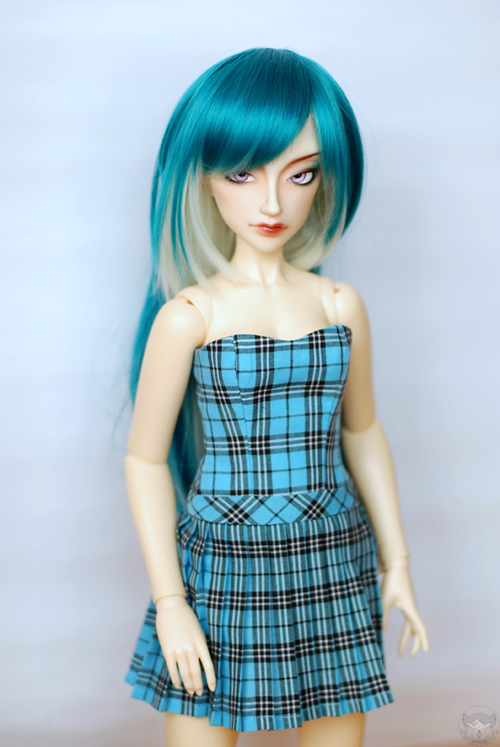
With the dress I have made here, I have used the line for my
centre front point, as it is the centre of the pattern. This way it will be
easier to achieve symmetry and balance cutting out other pieces. The waistband
is curved and I knew I wasn’t going to be able to match it to the bodice, so I
cut it so that the pattern is obviously diagonal as a contrast.
Now if we’re matching patterns on pattern pieces which have a flat edge, it’s naturally a lot easier than something with curves. So how do you get your curved pieces to match up?
Firstly, you are going to have to cut each piece out separately, you can’t fold your fabric in half and cut two pieces. Why? Because the patterns rarely match. You will have much more control if you cut each piece out separately.
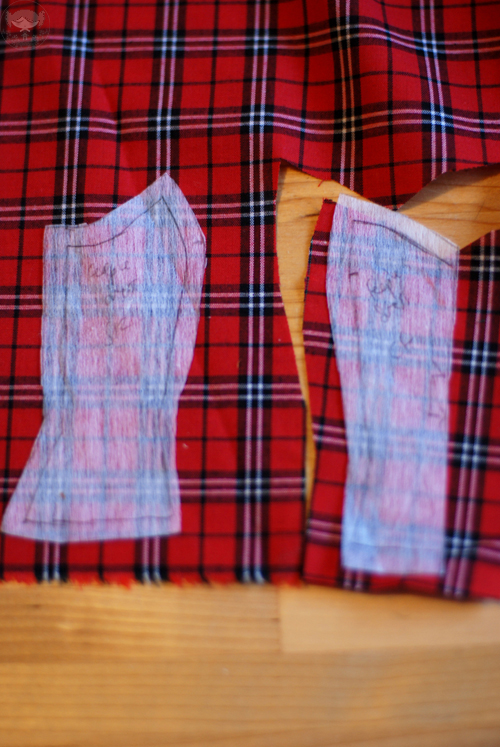
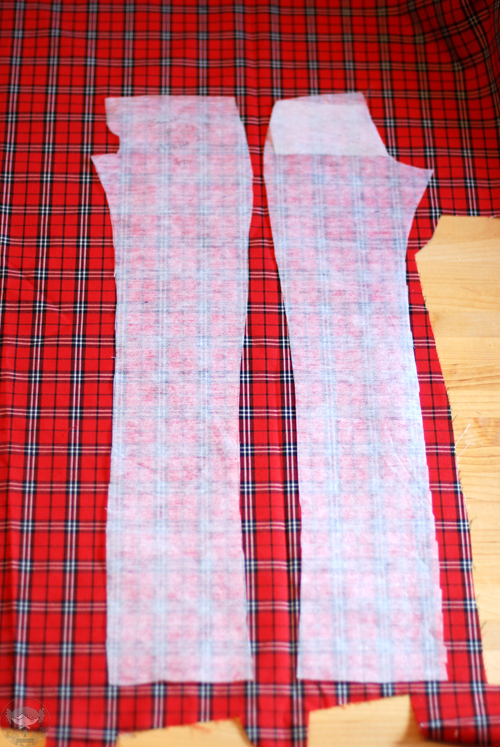
Once you have cut out your centre front piece/s, lay out the next piece. Make sure that any horizontal lines match up, especially at the top and bottom of the piece, the bust and the waist. You will use these lines to match your pattern up when sewing the pieces together.
The piece on the right is my centre front piece. The bottom of the piece is on a thin black line, so I have placed my side front piece on the same line. The little lines on my pattern at the curve of the bust is where the bust point is. I have just slightly cut into my pattern so that I know where the bust point is. Making a little cut into the fabric at the bust, waist and hip points can help with pattern matching if you have no horizontal lines on your fabric to match up (just be sure to not cut further in than the seam allowance!)
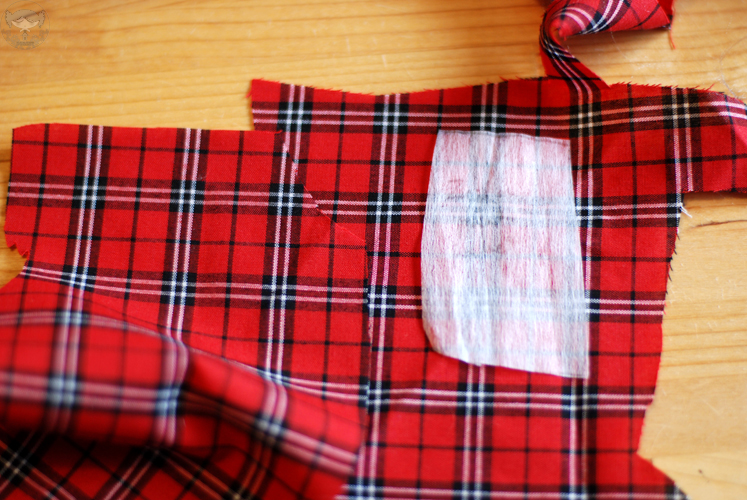
My cut is in between the thin black line and the thicker patterned line, so I line my side front pattern up the same. Once you have lined them up, cut them out. Then you do the same on the other side, making sure that it mirrors the piece you just cut out.
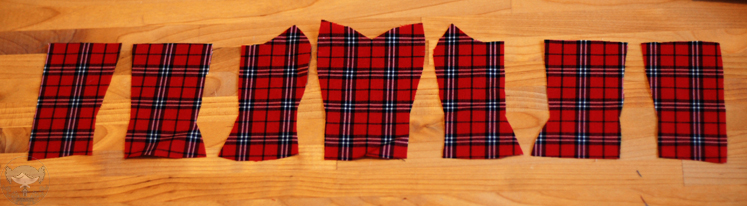
Then you do the same thing with each piece, lining it up against the connecting piece you just cut out, until you have all your pieces:
Check that everything balances out – your horizontal lines are staying horizontal; and your pieces mirror each other.
3. Matching patterns for pants.
Pattern matching works essentially the same for pants, except that this time the most visible point of matching is the side seam.
Lay your patterns out so that the side seams match, again using any horizontal lines as balance for the hem, crotch and hip lines.
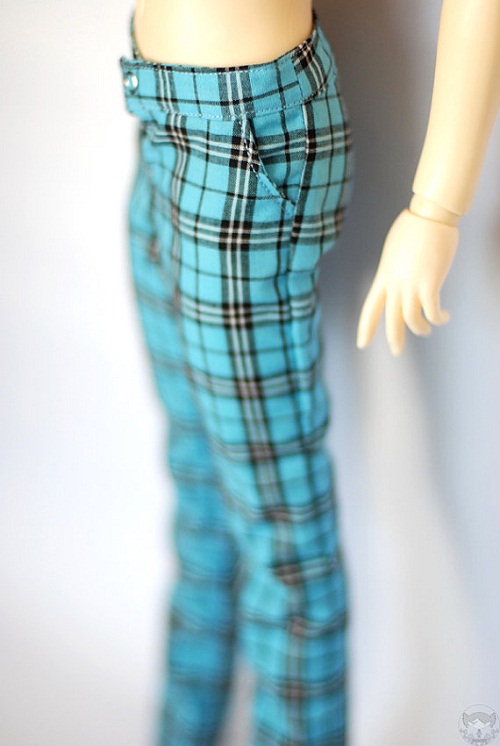
If you have pockets at the front, try and match up the pocket pieces with the front of the pants:
Once it is sewn, the patterns on the pants and pocket should match up like so:
4. Matching as you sew
As you are sewing, make sure you’re matching up any horizontal points. It is usually best to pin those main points together like so:
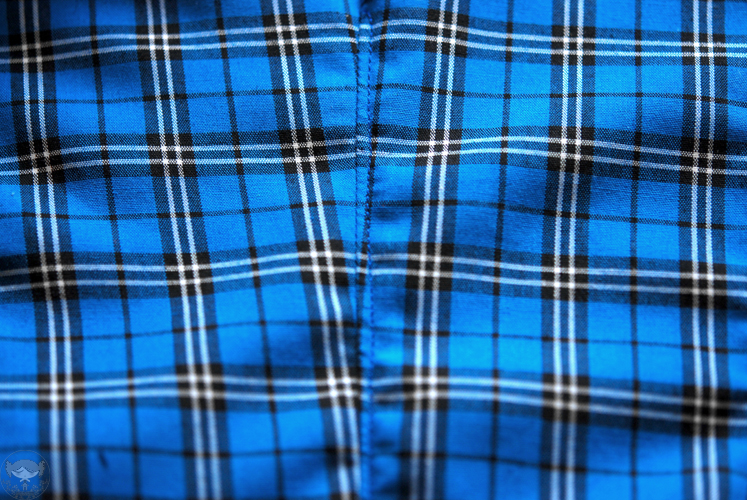
If they matched up correctly, they should look like this
once sewn:
And that's it! I hope that this has been helpful to people! By all means let me know if anything doesn't make sense, or if my tutorials need more pictures to help make things clearer.
3 comments:
This was great Mon, the information was helpful and easy, the pictures were great. Would you ever consider sharing tips on pattern making? Doesn't need to be a tutorial, just tips or pointers on how to improve the technique.
Well, I don't sew at all, but I can't agree with you more that matching a pattern can totally make an outfit. I don't know if you watch Project Runway, but I think Kenley got kicked out of All Stars because she refused to match up any of the crazy patterns she used. Her final dress could have been so much better...but it was so patch-worked because she didn't pay any attention to where she put her seams.
Fabulous tutorial!
Lily - I'm still thinking of a way that I can do it that is easy to understand. I might just do something like how to manipulate an existing pattern or block.
VampireAngel - I don't actually watch Project Runway. The few times I've seen it it's reminded me too much of the bullshit of my costume course, don't really want to relive that drama! I'm glad that it was something she lost on, you'd expect at that level that they would be trying to make their work of the utmost quality.
Post a Comment